 |
|
|
UER Store
|
|
 order your copy of Access All Areas today!
|
|
|
|
Activity
|
|
860 online
Server Time:
2024-05-13 09:56:44
|
|
|
 Snips
 
Location: Gold Coast
Gender: Male

Ok... So how do I get out
 | |  | Basic Abseiling Techniques and Equipment
< on 10/2/2011 12:35 AM >
|  | | | What is Abseiling
Abseiling is the sport of, safely, descending a cliff face (or in your case probably a wall).
Equipment
Abseiling needs special equipment and not just a rope. Equipment with on asterisk (*) is compulsory, equipment with two asterisks (**) is very highly recommended for safety anything else is just your guess.
Rope*
Rope is basically the backbone of abseiling, without it you just go hurtling of the drop. For abseiling, normal climbing rope can be used for the descent but 'static' rope is preferred. Static rope is basically the same as normal climbing rope but it has a lower stretch percentage (~2%), this makes coming down more comfortable.
There is also another type of rope called webbing, it resembles a flat rope, some thing like a karate belt and is mainly used for securing the main 'descending rope' to a secure point. Webbing rope is both light and strong sometimes holding over 10,000 lb.
Note: It is recommended that you take at least 30ft of rope with you.
Anchors*
Not really equipment but pretty dang important anyway.
An anchor is basically what you tie your rope to. Whether a tree or a boulder it has to be very stable (for your own sake). Other climbing equipment such as nuts and slcd's (Spring Loaded Camming Devices) can also be used. Nuts and slcd's work by mainly wedging themselves in a crack giving a sturdy anchor.
Harness*
A proper (and comfortable) climbing harness is essential part to abseiling (unless doing a classic abseil only involving a rope). You can use any type of harness you wish though It should fit you and be a little bit tight, it should also have 2 loops, one at the front and one at the back. The sit harness is the most popular harness in abseiling.
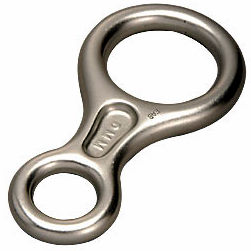
Carabiner and Descender*
A carabiner is used to attach ropes to an anchor point and join two items together. The carabiner is normally used just to join the descender and the harness together. A screw-gate carabiner is recommended as being one of the safest.

A descender a piece of equipment that slows down the descent. It works by using the friction of the rope on the descender to 'brake' it. The figure-of-8 descender is the most common. Note: after (and during) the descent the descender will get VERY hot, be careful.
Prusik Loop*
A prusik loop is basically a webbing rope tied into a loop. It is used for a safety backup if the abseiler loses control but most commonly for attaching a rope to a anchor.
Other
Because this is a BASIC guide all other equipment placed here will not have a explanation or picture:
Helmet**
Gloves
Shoes**
Technique (for a solo abseil)
Anchoring: The first step to performing an abseil is the anchor your rope to an object. This object should be strong and be able to easily take double your weight. This video will show you a way of anchoring to a bar: http://youtu.be/_M2BjfG6VyU
Descent: Before the descent you must double check all you're equipment. If everything is alright start by approaching the edge of the drop, with your rope taught step on the edge. Slowly lower you self to just above perpendicular (90deg) to the wall; a lot of your weight should be on you're feet (this is what is preventing you from slipping). Once you have achieved the correct posture slowly start walking down the face (staying perpendicular). About 10% down you're basically safe until you reach the bottom, you can even start doing little jumps now. Once near the bottom you should slow down and either
a)If you're not going to fast just step off from your descent
b)If you're going a little bit fast just try to slow down and land on your but or...
c) If you're going extremely fast and can't stop, brace yourself.
The video to do this is: http://youtu.be/74OA8Hb4hBk
Please give feedback and note that this is one of my first posts. Thanks!
[last edit 10/2/2011 6:03 AM by Snips - edited 3 times]
-Snips |
|
Snips
Location: Gold Coast
Gender: Male
Ok... So how do I get out
| | Re: Basic Abseiling Techniques and Equipment
<Reply # 1 on 10/7/2011 9:13 AM >
| | | | Come on someone, reply. This is my first big post.
[last edit 10/7/2011 9:13 AM by Snips - edited 1 times]
-Snips |
|
Loki
  
Location: Melbourne, Australia
Gender: Male

| | Re: Basic Abseiling Techniques and Equipment
<Reply # 2 on 10/8/2011 2:28 PM >
| | | | Posted by Snips
Come on someone, reply. This is my first big post.
|
Abseiling is one of those things that shouldn't be learnt from a forum post.
(Coming from someone who taught themselves how to abseil and has had many near disastrous fuck ups)
Wank | Wank | Wank | Wank | Wank | Wank |
|
Snips
Location: Gold Coast
Gender: Male
Ok... So how do I get out
| | Re: Basic Abseiling Techniques and Equipment
<Reply # 3 on 10/9/2011 12:02 AM >
| | | | Posted by Loki
Abseiling is one of those things that shouldn't be learnt from a forum post.
(Coming from someone who taught themselves how to abseil and has had many near disastrous fuck ups)
|
Thanks for your nice feedback. Anyway, This is only meant to be a basic idea.
-Snips |
|
ervanalb
Location: Cambridge, MA
Gender: Male
| | Re: Basic Abseiling Techniques and Equipment
<Reply # 4 on 11/2/2011 7:06 PM >
| | | | You'll have to forgive my American English, as we call it "rappelling" here 
I'm glad you posted this-- rappelling is one of my favorite means of transportation. However, I completely agree with Loki, that it is not something to be learned from a forum post.
In most circumstances, it's very obvious what you're trusting your life to-- the grip of your hands on a ladder rung, or the cement holding a pipe into the wall. With rappelling, you're trusting your life to a bunch of indirect things, whether it be the buckles on your harness, the integrity of the rope, or the strength of the anchor several hundred feet above you.
However, your post is still good in that it lets people know that rappelling is an available option in the realm of UE, and the basic idea so that they know what topics to pursue further.
With that out of the way, I have a few comments / corrections about your original post.
1) Hopefully this is obvious, but you absolutely must use rated climbing rope. And although webbing is rated, it is a terrible idea to descend on webbing because of its durability. If you accidentally swing across the face and rub your rope on the sharp concrete edge of a building, it will cut through the sheath but most likely leave the core mostly intact, and you will survive. If you were on webbing, the concrete would cut right through it and you would fall and die.
2) Webbing is used to connect your rope to the anchor points. You could tie the rope to your anchor point, but it is probably far from the edge. Since rope is expensive and heavy, you don't want to use more than you need. Additionally, you almost certainly want to use multiple anchor points.
3) It is good practice to always use two independent and "bomber" anchors. A "bomber" anchor is defined as an integral part of the building, most likely something that would survive should a bomb hit the building. If a bomber anchor were to fail, you would have larger issues than falling down the wall face. (and that's a pretty big issue!)
The guideline of "twice your weight" is a terrible idea, because should you accidentally shock-load the rope (e.g. when going over the edge) you can easily load the rope to three or more times your body weight.
I have never used a nut or SLCD on a building. If there exists a crack in a building, I probably wouldn't trust it to hold me.
4) You must make sure that you put on your harness correctly, e.g. double back your buckles if necessary. Also note that there are probably only one or two structural loops on your harness, the rest are just convenience loops for your gear.
5) You must use a climbing-rated carabiner. Keychain carabiners are rated to only about 150 pounds, and if you hang on one (never mind shock loading) it will break. Climbing rated carabiners can hold around 24 kilonewtons.
6) 8's are excellent descending devices.
7) A prusik loop is not what is described here, but it is still essential. What is described here is most like a "cows tail." It is a length of webbing or rope tied from a structural point on your harness to a carabiner. It allows you to "clip in" to anchors directly on a precipice. It is probably not necessary for urban rappelling but will definitely come in handy.
A prusik loop is a length of accessory cord tied into a loop using e.g. a double-fisherman's knot. A prusik loop is tied to the rope with a prusik knot. Two prusik loops allow for ascending and down-climbing. This is absolutely necessary in the case that there is some emergency while on rappel, such as your hair getting caught or running out of rope. I have seen too many people put in terrible positions because they knew how to rappel but not how to ascend.
8) I find a helmet unnecessary for urban terrain. It's your call.
9) Gloves are almost definitely necessary for rappelling to avoid rope-burn as the rope slides through your hands. It is possible to rappel short distances without gloves, and I have done so many times, but it is really shitty.
10) Rappelling without shoes is not necessarily dangerous, but it's kind of dumb. Flip-flops will probably fall off your feet. Shoes are absolutely necessary for ascending.
I suggest you pair up with someone who has rappelled before to learn proper technique. There's no substitute.
If you've rappelled in the context of climbing, caving, or canyoning, understand the differences between these environments and urban terrain. Learn what is and is not a bomber anchor, and be sure to use edge-guards liberally as granite is much nicer on your rope than concrete (imagine that!)
If you're a skilled rappeller, you may want to look into fancier things such as passing knots, pull-down rappels and releasable anchors.
This is meant to be a cursory guide for someone looking to get started with rappelling (so they know what questions to ask their instructor) or a reminder for those already knowledgeable in the technique. Remember, rappelling is not something that should be learned from a forum post.
|
|
aimless_drifter
| | Re: Basic Abseiling Techniques and Equipment
<Reply # 5 on 11/21/2011 5:38 AM >
| | | | Webbing is used to connect your rope to the anchor points. You could tie the rope to your anchor point, but it is probably far from the edge. Since rope is expensive and heavy, you don't want to use more than you need. Additionally, you almost certainly want to use multiple anchor points.
If you have a good anchor such as structural steel, only one anchor point is necessary. It only takes about three foot of rope to go around an I beam and use a figure 8 follow through for an anchor.
3) It is good practice to always use two independent and "bomber" anchors. A "bomber" anchor is defined as an integral part of the building, most likely something that would survive should a bomb hit the building. If a bomber anchor were to fail, you would have larger issues than falling down the wall face. (and that's a pretty big issue!)
Anchors should be bomb proof, we usually test them by having two people pull on them at the same time to see if they move.
The guideline of "twice your weight" is a terrible idea, because should you accidentally shock-load the rope (e.g. when going over the edge) you can easily load the rope to three or more times your body weight.
Agreed, a six foot fall puts aprox 5000 lbs of force on your system according to OSHA
7) A prusik loop is not what is described here, but it is still essential. What is described here is most like a "cows tail." It is a length of webbing or rope tied from a structural point on your harness to a carabiner. It allows you to "clip in" to anchors directly on a precipice. It is probably not necessary for urban rappelling but will definitely come in handy.
A prusik loop is a length of accessory cord tied into a loop using e.g. a double-fisherman's knot. A prusik loop is tied to the rope with a prusik knot. Two prusik loops allow for ascending and down-climbing. This is absolutely necessary in the case that there is some emergency while on rappel, such as your hair getting caught or running out of rope. I have seen too many people put in terrible positions because they knew how to rappel but not how to ascend.
A prusik will bite best if it is smaller than your main line. So if you are using 11mm rope, a 6mm prusik will bite well.
I suggest you pair up with someone who has rappelled before to learn proper technique. There's no substitute.
If you've rappelled in the context of climbing, caving, or canyoning, understand the differences between these environments and urban terrain. Learn what is and is not a bomber anchor, and be sure to use edge-guards liberally as granite is much nicer on your rope than concrete (imagine that!) |
|
|
|
|
|
|
|
|
|
|
Lost4Now
Gender: Male

| | Re: Basic Abseiling Techniques and Equipment
<Reply # 6 on 11/21/2011 6:22 PM >
| | | | This is taken from:
http://www.camp4.c...dex.php?newsid=231
A fall of less than four feet on a static rope or sling can create enough shock force to cause serious injury or death. Bearing in mind that the human body can only handle, for a brief instant , a shock force of 12 kN without risking serious injury, you don't want to go around absorbing 18 kN. And you should know that 18 kN is getting real close to, or over, the minimum limits set by the UIAA on all the gear in your safety system.
For purposes of comparison, here are the UIAA limits;
Anchors: 25 kN
Carabiners: 20 kN
Slings: 22 kN
Harnesses: 15 kN
From me:
Dynamic forces are so huge, you should work with a MINIMUM of a 10:1 ratio of actual weight and rated weight of your gear. The weakest link is not the gear, but the user of the gear. Your body will give long before your equipment fails (if it is properly used and cared for (but I guess the same can be said for the body too!))
|
|
dsankt
 
Location: live and in the fresh

| |  | |  | Re: Basic Abseiling Techniques and Equipment
<Reply # 7 on 11/23/2011 8:32 PM >
| | | | tldr: get an old grigri + 9mm rope, throw yourself off highstuff and wonder why you can't stop 
[last edit 11/24/2011 6:02 AM by dsankt - edited 1 times]
sleepycity.net: watch out for the third rail baby, that shit is high voltage. urbex and urban exploration photography |
|
Loki
Location: Melbourne, Australia
Gender: Male
| | Re: Basic Abseiling Techniques and Equipment
<Reply # 9 on 11/25/2011 12:38 PM >
| | | |
Eeeeepppiiiiiccccc!!!!!
Wank | Wank | Wank | Wank | Wank | Wank |
|
|
|
All content and images copyright © 2002-2024 UER.CA and respective creators. Graphical Design by Crossfire.
To contact webmaster, or click to email with problems or other questions about this site:
UER CONTACT
View Terms of Service |
View Privacy Policy |
Server colocation provided by Beanfield
This page was generated for you in 78 milliseconds. Since June 23, 2002, a total of 741551623 pages have been generated.
|
|


